VertexPaint mode didn't show interpolated (smooth) colors in faces.
Error caused by Modifier & DerivedMesh commit of august 22. Rules for
drawing smooth changed a bit...
Copy modifiers menu should be available for Lattice and Surface objects.

Note it does not support copying between different object types, that
is being indicated with a notice popup now.

I rather not code copying to other object types for now, this is something
which fits better in the modifiers API first. Right now the buttons code
handles this.
Nkey panel for creases median didn't work properly. Now it does as follows:
- if set to 0 or 1 it applies that value to all creases
- else it adds the diffference of median crease value and the button value

Bugfix #5122

Paths drawing option for Poses now uses entire startframe-endframe range.
Before it skipped the last frame for drawing.
Deleting all points in a Curve object created empty DispList blocks. The
drawing code didn't like that.
Secured it by both fixing drawing as skipping adding empty DispLists.

Special thanks to Fernando Bastos for the extensive stack tracing.
Added undo push after "create UV grid image".
Note that it won't help much, since the Imbuf is freed on undo... that's
for another project, to have a fixed Image cache to use in Blender.
With the addition of vertexgroup support for Lattices, the option
'create vertex groups from closest bone' crashed due to reading NULL.

Fix provided & tested by Joshua.
Dupli-group doesn't work yet for metaballs. Code entered an eternal loop,
because the group-duplication code calls again the metaball creation code.

Disabled this. MakeDisplist needs review!
- Removing Shape Keys didn't free drivers
- The sample file had Shapekeys in a weird order (should be sorted on shape
  index number). How this could have happened is unknown, probably a script.
  For the time being added a version patch to check on this after reading
  a file. If wrong ordered, it gives warning prints.
Using the Library Append "at cursor" option went wrong;
- it moved all selected objects to cursor position
- it didn't even check what was imported...

Both issues are fixed now.
* when an object had wire draw in Draw Extra enabled and
  it was selected and set as a scene, it would draw
  as selected. Changed so it draws the wires in a grey
  shade, to communicate it is not in the active scene
If you rename a Constraint, the used Constraint Channels (Ipo curves) were
not renamed as well, making animations not work anymore.

Now renaming works up to this level:
- own object constraints
- own object Action constraints

This is identical to Bone renaming. Note that other actions (like in NLA)
are not corrected for renaming. Have to look at ways to provide that once.
Apparently being so scroogish for cpu cycles makes crashes in Linux. I'll
add it on todo for later checks, but I need a windows or linux coder for
it!

For users: it might fix crashes when you have NodeTrees in Libraries.
- Removed obsolete IRIZ image support from menus.
  This was a Blender-only version of SGI Iris images, used internally in
  the nineties because it was the only format supporting Z easily
  A much better Z exporting - and industry compliant - is via OpenEXR

- Scene strips in Sequencer now get Z buffers as well. This is only in
  float format, containing actual distances from the camera.
The "Copy Size" constraint was calling a where_is_object(), this caused
the depsgraph to mess up in very weird ways and rare occasions. In the
sample file it showed strange lags in bones for using the "Stride bone"
option.

While trying to locate the bug I've revisited the Pose depsgraph in detail,
trying to figure out how it can print possible cycle errors in dependency.
That has been added now too (in console). Unfortunately the bugreport
example had no cycle errors. :)
Clear transform (ALT+G/R/S) in Pose sometimes didnt work, for example when
armature is being controlled by other armature. Caused by double depsgraph
flushing.
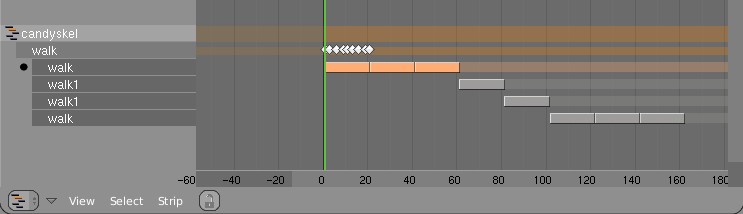
- FORWARD CYCLING & MATCHING

Up to no now, adding multiple actions in NLA with walkcycles required to
animate them standing still, as if walking on a conveyor belt. The stride
option then makes the object itself move forward, trying to keep the foot
stuck on the floor (with poor results!).
This option now allows to make walk cycles moving forward. By
indicating a reference Offset Bone, the NLA system will use that bone to
detect the correct offset for the Armature Pose to make it seamlessly going
forward.

Best of all, this option works as for cyclic Action Strips as well as for
individual Action Strips. Note that for individual strips, you have to set
the strip on "Hold". (Might become automatic detected later).

Here's an example edit image for NLA:
http://www.blender.org/bf/nla_match-cycle.jpg
And the animation for it:
http://download.blender.org/demo/test/2.43/0001_0150_match.avi
Blender file:
http://download.blender.org/demo/test/2.43/mancandy_matching.blend

Using this kind of cycling works pretty straightforward, and is a lot
easier to setup than Stride Bones.

To be further tested:
- Blending cycles
- matching rotation for the bones as well.

- ACTION MODIFIERS (motion deformors)

The above option was actually required for this feature. Typically walk
cycles are constructed with certain Bones to be the handles, controlling
for example the torso or feet.
An Action Modifier allows you to use a Curve Path to deform the motion of
these controlling bones. This uses the existing Curve Deformation option.
Modifiers can be added per Action Strip, each controlling a channel (bone)
by choice, and even allows to layer multiple modifiers on top of each other
(several paths deforming motion). This option is using the dependency graph,
so editing the Curve will give realtime changes in the Armature.

The previous walkcycle, controlled by two curves:
http://download.blender.org/demo/test/2.43/0001_0150_deform.avi
Blender file:
http://download.blender.org/demo/test/2.43/mancandy_actiondeform.blend

Action Modifiers can be added in the NLA Properties Panel. Per Modifier you
have to indicate the channel and a Curve Object. You can copy modifiers from
one strip to another using CTRL+C (only copies to active Object strips).

Setting up a correct Curve Path has to be carefully done:
- Use SHIFT+A "Curve Path" in top view, or ensure the path is not rotated.
- make sure the center point of the Curve Object is at the center of the
  Armature (or above)
- move the first point of the curve to the center point as well.
- check if the path starts from this first point, you can change it using
  (in Curve EditMode) the option Wkey -> "Switch Direction"
- Make sure alignment uses the correct axis; if the Armature walks into
  the negative Y direction, you have to set in Object Buttons, "Anim settings"
  Panel, the correct Track option. (Note; option will probably move to the
  Modifier later).

This is a good reason to make such paths automatic (on a command). Is on the
todo list.

Also note this:
- the Curve Path extends in beginning and ending, that's (for now) the default,
  and allows to use multiple paths. Make sure paths begin and end horizontal.
- Moving the Curve in Object Mode will change the "mapping" (as if the landscape
  a character walks over moves). Moving the Curve in Edit Mode will change the
  actual position of the deformation.
- Speed (Ipos) on paths is not supported yet, will be done.
- The Curve "Stretch" deform option doesn't work.
- Modifiers are executed *after* all actions in NLA are evaluated, there's no
  support yet for blending multiple strips with Modifiers.
- This doesn't work yet for time-mapping...

This commit is mostly for review by character animators... some details or
working methods might change.
This feature can also be used for other modifiers, such as noise (Perlin) or
the mythical "Oomph" (frequency control) and of course Python.

Special thanks to Bassam & Matt for research & design help. Have fun!
settings, rather than using the object's TrackX/Y/Z/etc buttons.

 This is good for two reasons: a) having the settings over in the object buttons
 before was terribly unintuitive and hidden, now it's more visible how to
 control the deformation, and b) now if you have more than one curve modifier,
 they can have their own settings, instead of being forced to use the object
 level data.
Especially for Compositing it was annoying that colors always got clipped
in the 0.0-1.0 range. For this reason, extrapolated Curves now is the
default. Old saved files still have horizontal extrapolation.

Set the option with 'Tools' menu (wrench icon). This is a setting per
curve, so you might need to set all 4 curves for an RGBA curves widget.
input nodes was 'passing on' the buffer (because it didn't operate on the
image). That's for example for Blur with size 0 or for Translate node.
This passed-on buffer then got freed inside the group...

Solution now is just a malloc. Better system should be devised, with
reference counting or so. Thanks Ivan Hoffmann for the sample file!
* This addresses the long command-line problem when building with SCons/MingW on windows through a dosbox (cmd.exe).

My test buildpath was: C:\Documents and Settings\nathan\My Documents\blender\build\win32-mingw
Should be rather long enough, don't you think?

/Nathan